[su_row][su_column size=”1/2″ center=”no” class=””]
[/su_column]
[su_column size=”1/2″ center=”no” class=””]
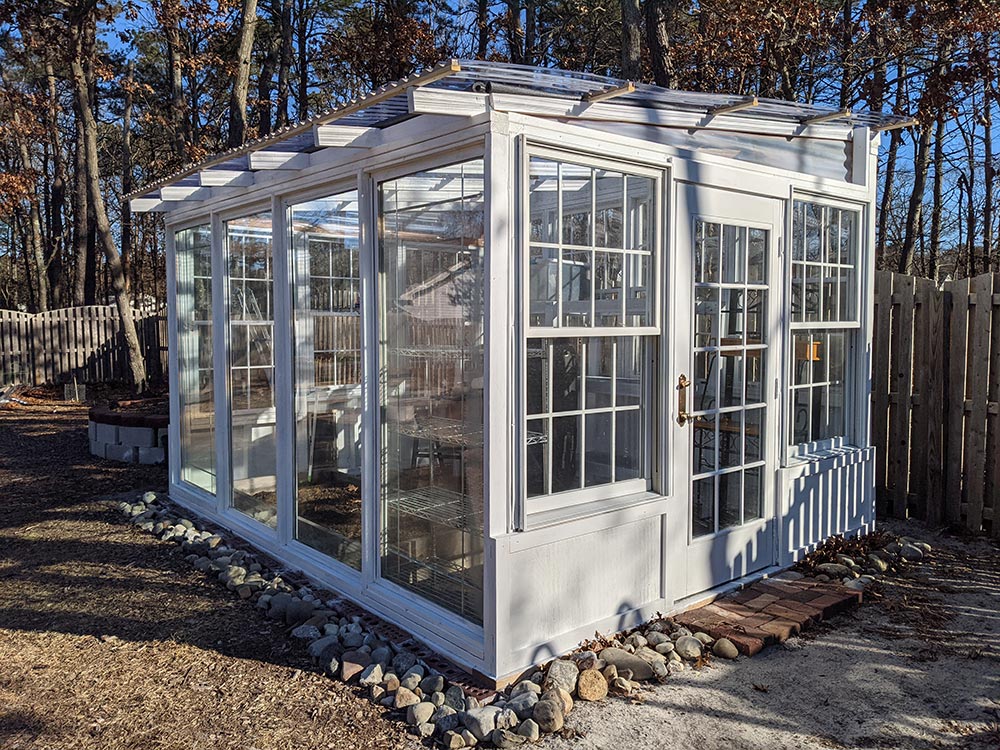
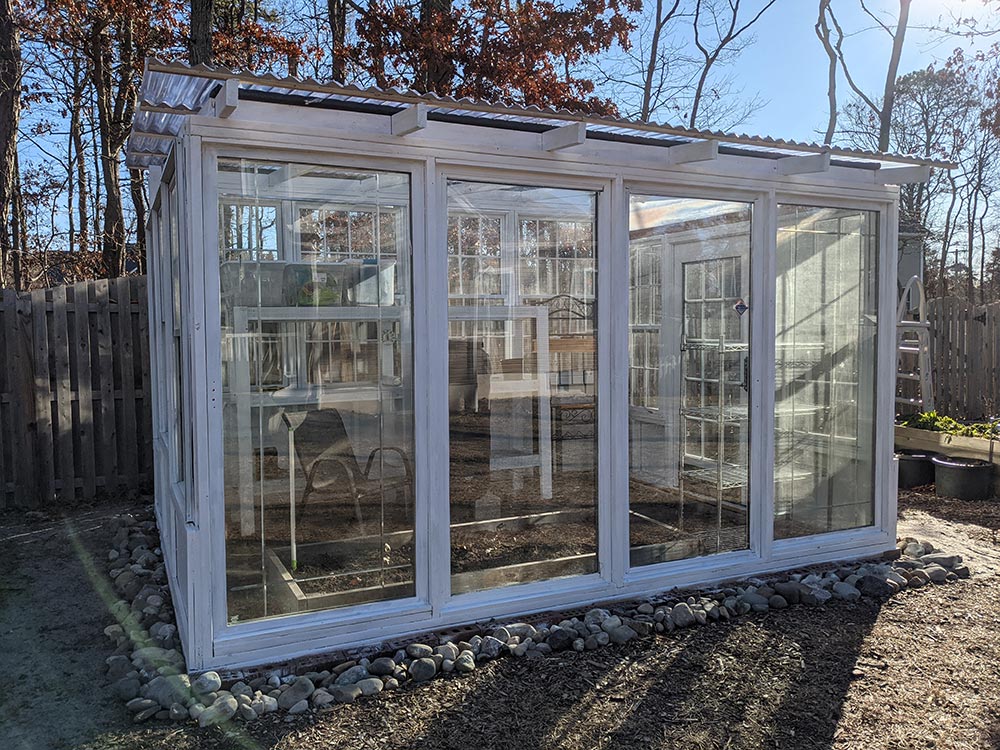
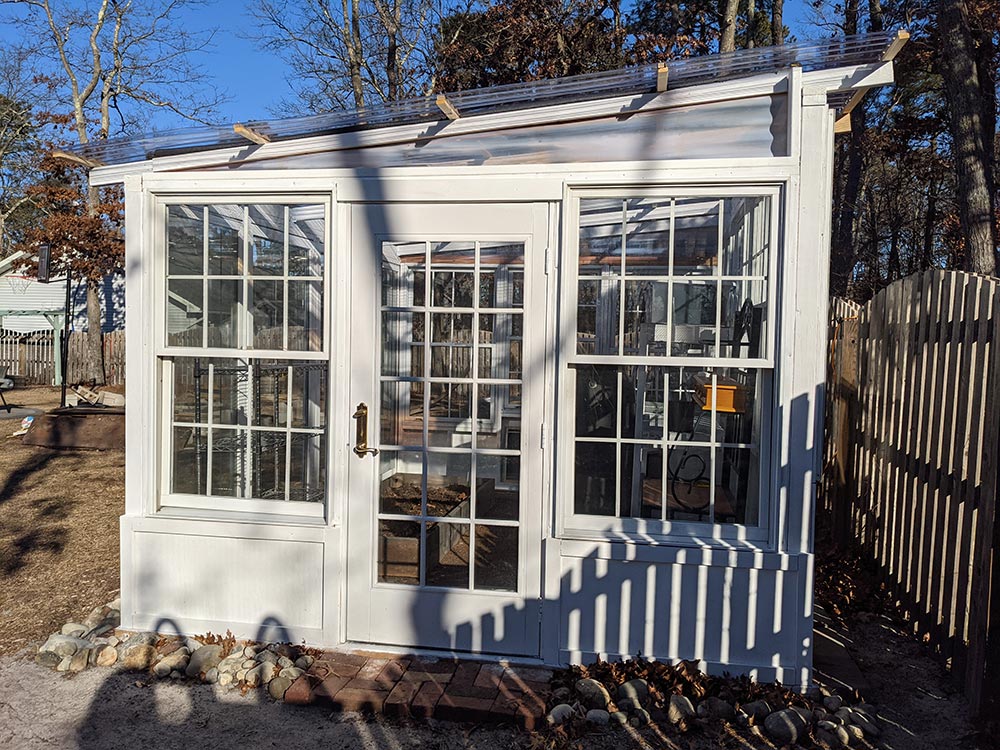
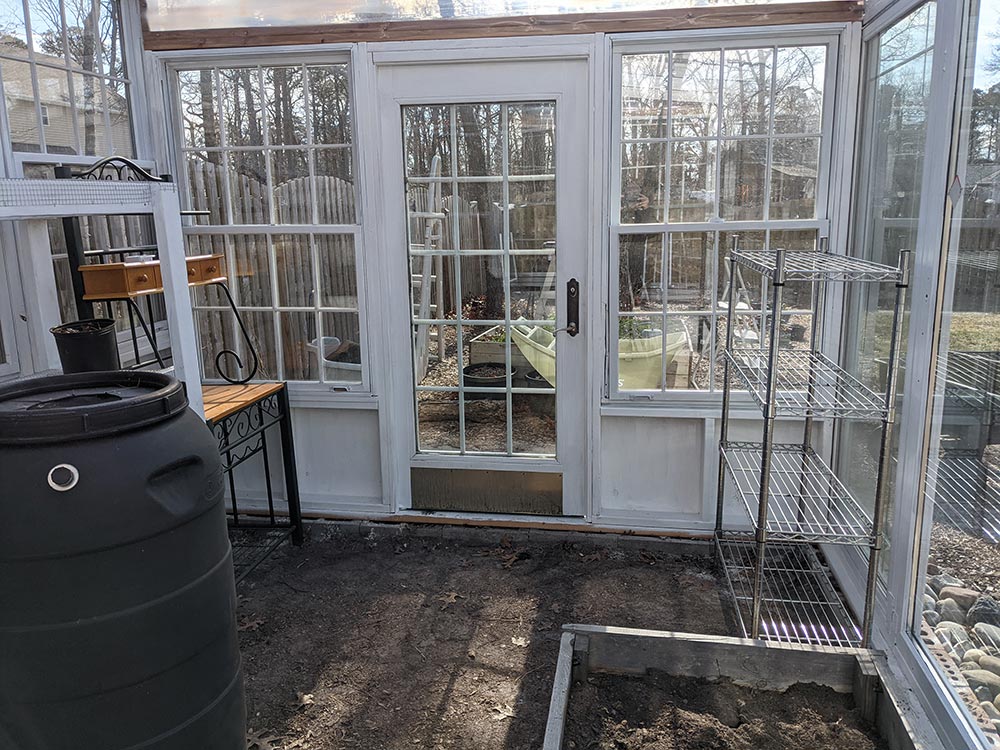
In the video I mentioned that we got all the windows and doors from Facebook marketplace users, but I didn’t mention that the two sliders on either end of the front wall came from my dear friend Phyllis from Toms River, NJ. She generously gave 4 slider doors for this project and I’m so grateful. Thanks Phyllis!
The construction of the greenhouse built from old windows is finished and I’ve started to move in and make myself at home. I couldn’t wait until spring to paint the greenhouse. In my defense, I read on the side of the paint can that the weather had to be over 35* for at least four hours after the paint is applied. I made sure to paint in the early afternoon on days when that would hold true. So far, so good. Though I could probably use another coat in a few places.
[/su_column][/su_row]
I will wait until spring to apply the caulk to seal the seams and small gaps. Even with these openings, the temperature outside today was 27* and inside the greenhouse this afternoon it was almost 70*!
[su_row][su_column size=”1/2″ center=”no” class=””]
[/su_column]
[su_column size=”1/2″ center=”no” class=””]
[/su_column][/su_row]
Fleas in the Greenhouse – Pest Control Solutions
We had some trouble with fleas in (and around) the #greenhouse! Ack! My old keyhole garden was in this spot and there were critters like chipmunks and mice in and out of it constantly. Picture it! Nice warm compost basket in the middle, filled with food scraps and a critter condominium complex of cinderblocks with nice dry holes to make cozy homes in. Take note – when building garden beds of cinderblocks, fill in the holes so animals don’t move in.
Mom thinks the vermin were the cause of the fleas. I guess that’s true, but I don’t think the keyhole was entirely to blame. The whole yard is filled with burrows and squirrels frolic over the fence – burying and digging up acorns throughout the property all day long. It could have been anyone and that’s the story I’m sticking to. I also scraped away all the mulch to reveal my super sandy soil and fleas love sand.
[su_row][su_column size=”1/2″ center=”no” class=””]

[/su_column]
[su_column size=”1/2″ center=”no” class=””]
[/su_column][/su_row]
I’ve sprayed wondercide (cedar oil spray) a few times and it seems to knock them back. If you use this product, make sure to spray again after it rains if you are having a real problem. If not, after a few days, the fleas will come back. The forecast looked dry for 9 days straight so I sprayed that and then the next day I spread diatomaceous earth in and around the building. A one, two punch! I haven’t seen a flea since!
Tracking the Temperature
I ordered the [ThermoPro TP60S Digital Hygrometer Indoor Outdoor Thermometer Wireless Temperature and Humidity Gauge Monitor Room Thermometer with 200ft/60m Range Humidity Meter] so I could tell the temperature of the greenhouse from inside my nice warm kitchen. I installed the batteries, synced the unit with the little monitor station that goes out in the greenhouse and put them in their places. The first morning, the temperature reading seemed to be way off… Like by more than 10 degrees. Disappointed, I figured you get what you pay for and dismissed the gadget. As the days went by, I checked periodically and tried moving the monitor in the greenhouse around to different places. I installed a large thermometer in the greenhouse so I could match up the readings, and they have been close – only off by a degree or two. I’m pretty confident the product is fairly accurate.
Heating the Greenhouse
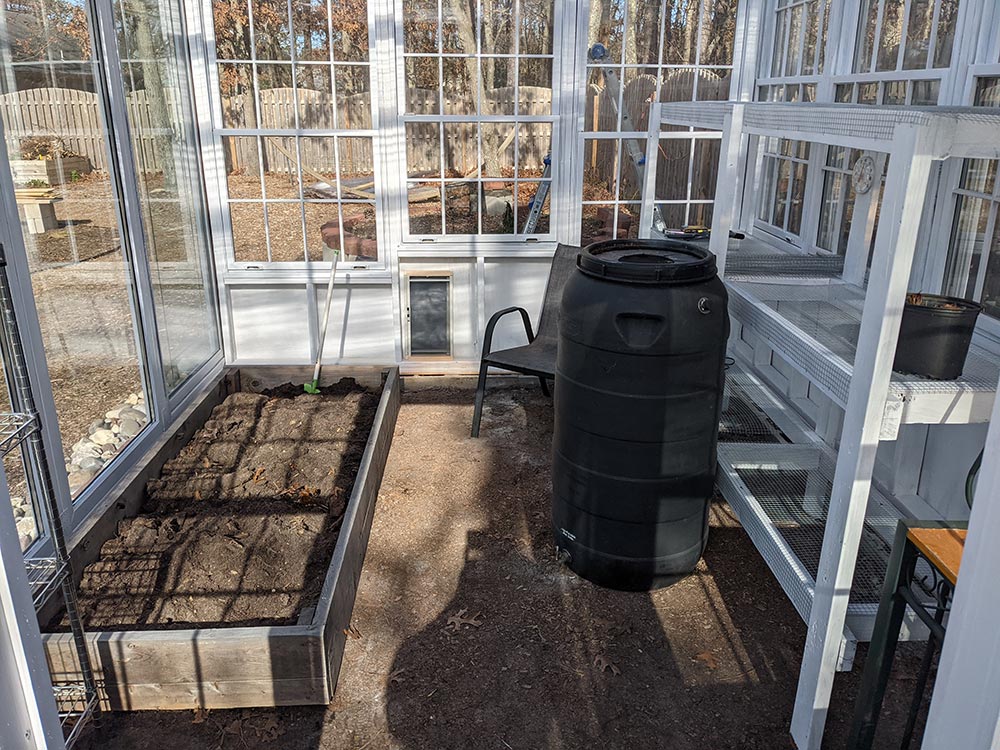
I haven’t moved any plants or seedlings into the greenhouse yet because it’s very cold now. I am looking forward to those days where the temperature starts to climb – so until then I have to try to employ some strategies to keep the greenhouse above freezing on cold nights. A friend of mine gifted me a black rain barrel before she moved and I’m going to use that as a thermal mass heating system. I’ll fill the barrel with water and it will gather heat on sunny days when the greenhouse heats up. Then, when it gets cold again at night, the barrel will slowly release heat and hopefully keep the seedlings around it comfortable. I’ll report back and keep your all informed about how it works.
[su_row][su_column size=”1/2″ center=”no” class=””]
[/su_column]
[su_column size=”1/2″ center=”no” class=””]
[/su_column][/su_row]
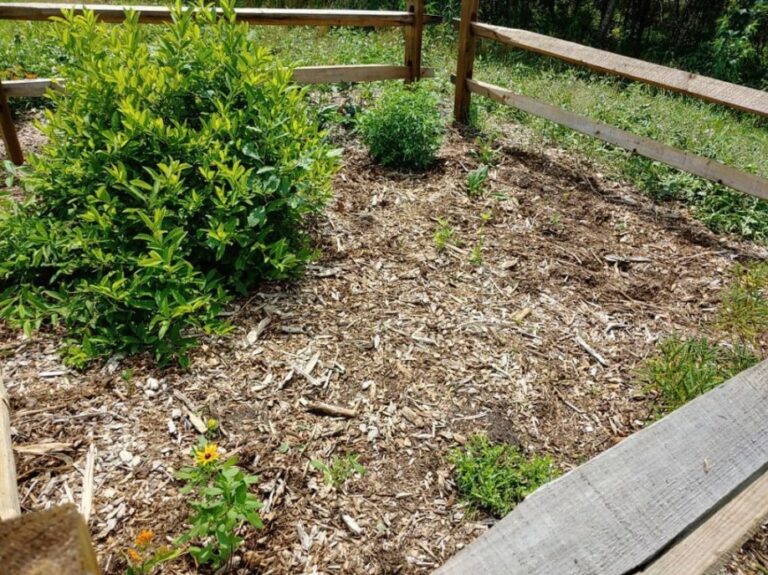
The in-ground bed is filled with hugelkulture to help retain moisture and slowly release nutrients over time. Hugelkulture beds are filled with logs, branches, leaf litter and garden waste. Then you add manure, compost and soil to the top. They are usually built as large mounds above ground. As the logs rot, nutrients are released to feed the plants. The logs also become spongey and absorb huge amounts of water. This allows you to irrigate the garden less frequently. I filled this raised garden bed with logs, topped them with soil from a garden I moved out of this space and then finished with a layer of composted manure.
It may be too cold to start seeds out there right now… but spring will be here before we know it. In the house, I’ve planted some ginger and turmeric roots I picked up from whole foods. These will take 6-8 weeks to sprout. I’ve also put an organic sweet potato in a dish of water on the window sill, to get started on some slips. I’ll move these heat loving plants out to the greenhouse as soon as I can. Enjoy the winter, friends. It’s going to be a busy spring!
If you have questions or want to talk to me about the greenhouse build, please visit our Facebook page or the youtube channel and leave me a comment. Talk to you soon!
Related Posts