The building is just about complete! I have a few tips for anyone trying to build a greenhouse from old windows on their own. We encountered a few issues during this stage of construction that would have saved us money and materials.
Roof panels – How to Store and Cut the Material.
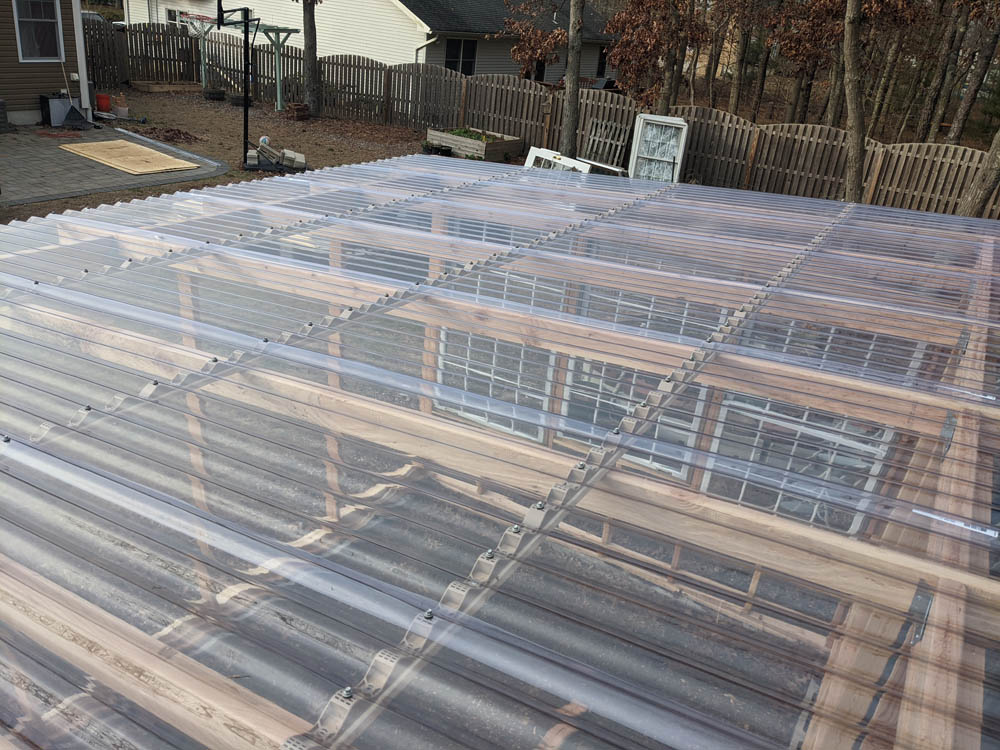
Originally, over the summer we sourced used transparent corrugated polycarbonate roof panels from an old barn that had been demolished during a renovation project. These panels were free and the size we wanted, but they were old and some of them had a few cracks. The barn was huge, so we took more than we needed and figured we would have enough to cover the roof at least twice.
When we unloaded them from the back of my truck, we put them in a pile in the back corner of the yard and weighed them down until we needed to install them on the greenhouse. As the weeks went by, I noticed they seemed to get more and more discolored and warped as they sat in that spot… I supposed that it was because they were getting wet or some mold was starting to grow in between the panels. But the problem was the way we were storing them.
When we got closer to installing the roof, I looked up some videos on how to use those panels and the supplies I would need for installation. The manufacturer states that it’s important to store them in a shaded area and to cover them with a tarp to protect them from the sun. If they are exposed to the sun in a pile, heat will collect between the panels and cause them to warp and become damaged. Ugh.
Due to this mistake, we had to buy new roof panels $32 and change each from Home Depot. I needed 7 panels for the roof – remember each overlaps one corrugation on each side (except the 2 on the ends). We waited to buy the new panels until they day were were ready to install them so we didn’t have to worry about storage.
Also, the last panel ended up being too wide and we needed to cut it all the way down the long side. The manufacturer says, if you need to cut the panels, you should clamp them together and use a saw (we only needed to cut one). They also mention, if you need to notch them for any reason, to use snips. I had a brand new set of off-set snips to use for this purpose, but when I started to cut… the snips shattered the plastic! If I kept going, I would have wrecked the whole panel.
If you have to cut the panels, use a new blade on a box cutter and carefully score the panels. I did this on top of a piece of plywood in case the blade went all the way through. If they don’t cut all the way through, you should be able to gently bend along your cut and they should come apart beautifully.
Plywood planning.
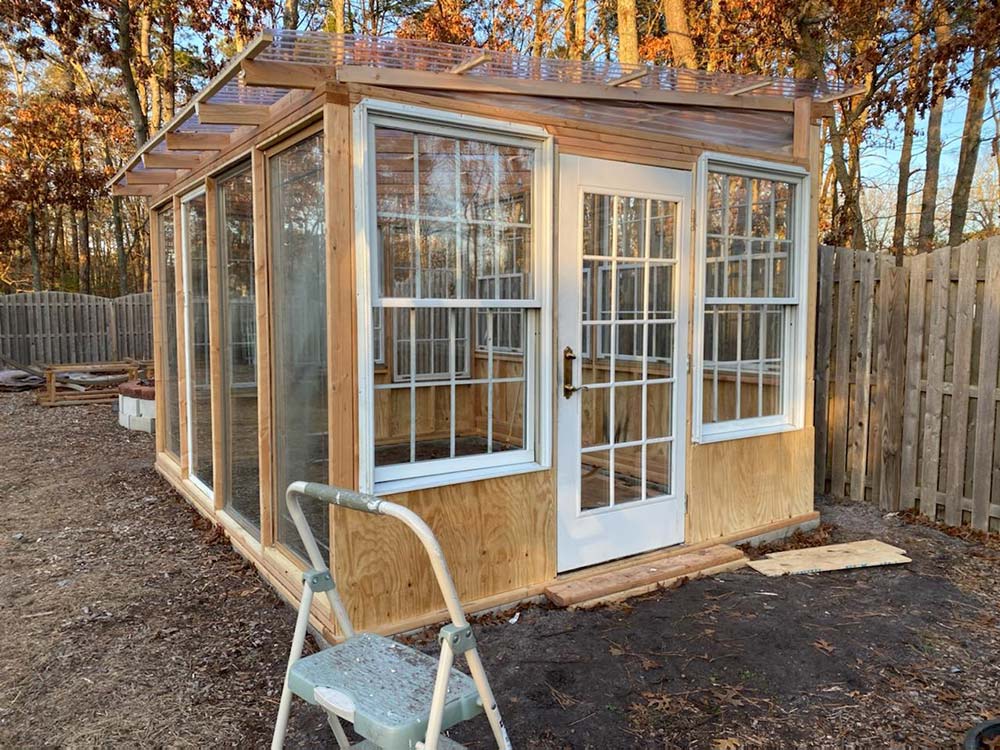
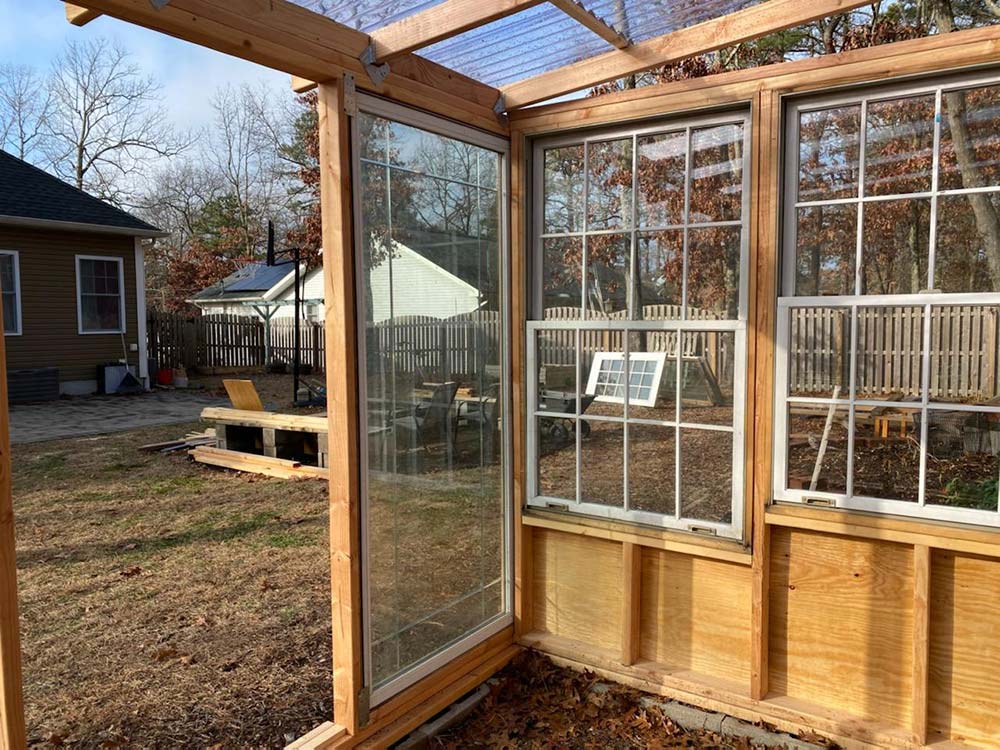
Speaking of plywood. You’ll notice in our photos that we do have a few areas of the green house that required plywood to finish the wall under the windows. I originally bought 2 sheets of plywood to cover these sections, but even if I made the best use of those 8×4 sheets, I would have needed more. My advice is to take a few minutes to work out the most efficient use of your boards to maximize the amount you’ll be able to use.
I rushed in and cut down the length of the board, hoping to minimize the amount of wall seams I would have… but that was foolish and I wasted most of that board because my second piece wasn’t large enough to cover what I needed. Husband noticed what I was doing and suggested flipping the board to cut smaller sections off the short side which resulted in having more usable area of the board and less waste.
[su_row][su_column size=”1/2″ center=”no” class=””]
[/su_column]
[su_column size=”1/2″ center=”no” class=””]
[/su_column][/su_row]
Slider door installation.
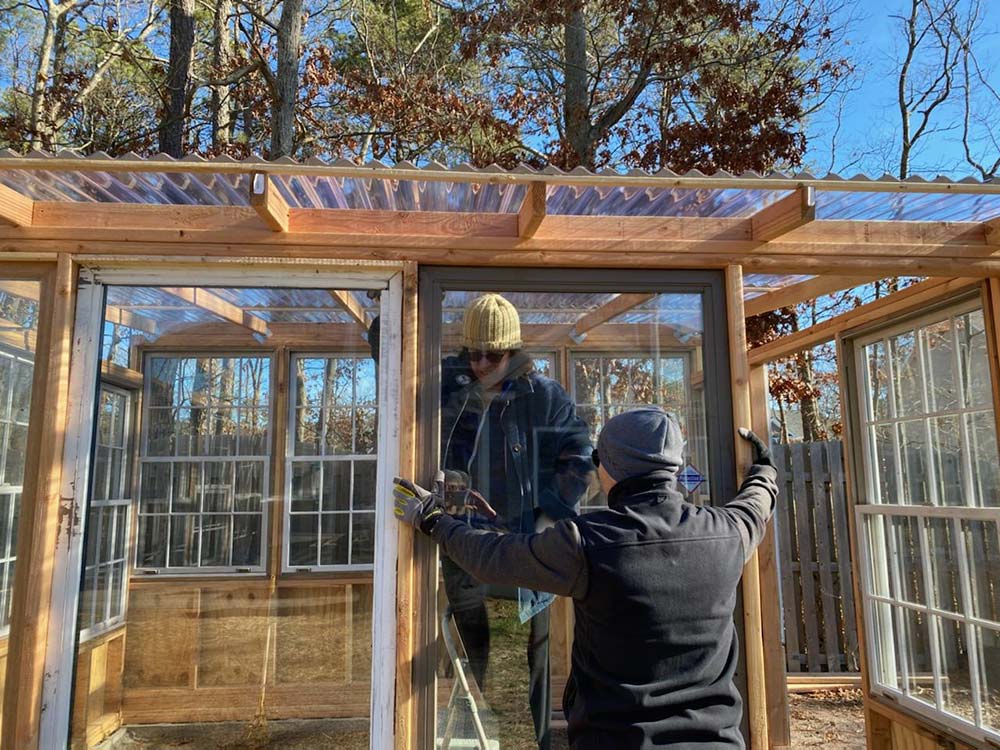
The windows on the greenhouse had frames and aluminum edges which made it easy to install them into the wall frame. The holes were there so we could screw right through the aluminum to hold them in place. The slider door panels didn’t have that and there was no obvious way to hold them inside our wall frame. We decided to brace the windows from inside the greenhouse using a metal mending plate in each corner to hold them in so the sliders wouldn’t fall backward into the greenhouse. On the front, we cut a 1×2 pine board, the same boards running across the roof rafters to hold the corrugated panels. We installed a strip at the top and bottom of the slider door and now they are secure in those spaces, without having to drill through the frame of the slider.
What’s left to do?
Now that the window, sliders, roof and door are installed, all that’s left is some decorative trim. I bought some 1×3 common boards to use along the roof, but changed my mind during construction and switched to pine 1×2 boards. Those 1×3 boards are nice and will add a finished look to the plywood sections of wall if I use them as molding to look like a shakers style cabinet. There is also a bit of trim that needs to go around the inside of the entry door so that it doesn’t push in too far and rip the door frame apart. This molding is the most expensive wood in the greenhouse – from home depot at .88c a linear foot! If only I had a table saw to make my own.
Lastly, I’ll need to caulk and paint the whole building and insulate the edges under the roof with some foam weather stripping or maybe foam pipe insultation. I’ll need to price out available products and see what fits well in the space.
